

Creating a Level
This page is a step by step guide to making a 2D platformer
Creating a Level
Create a new scene by clicking the + button in the scene tabs. Add a 2D Scene and rename it Level1.
Click and drag your Player scene from the FileSystem into the Level1 Scene Node Tree as a child of Level1.
Add a TileMapLayer node as a child of Level1. Rename this to Foreground and create a new Tile Set using the Inspector. This should open 2 new menus at the bottom of the screen, a TileSet menu and a TileMap menu.
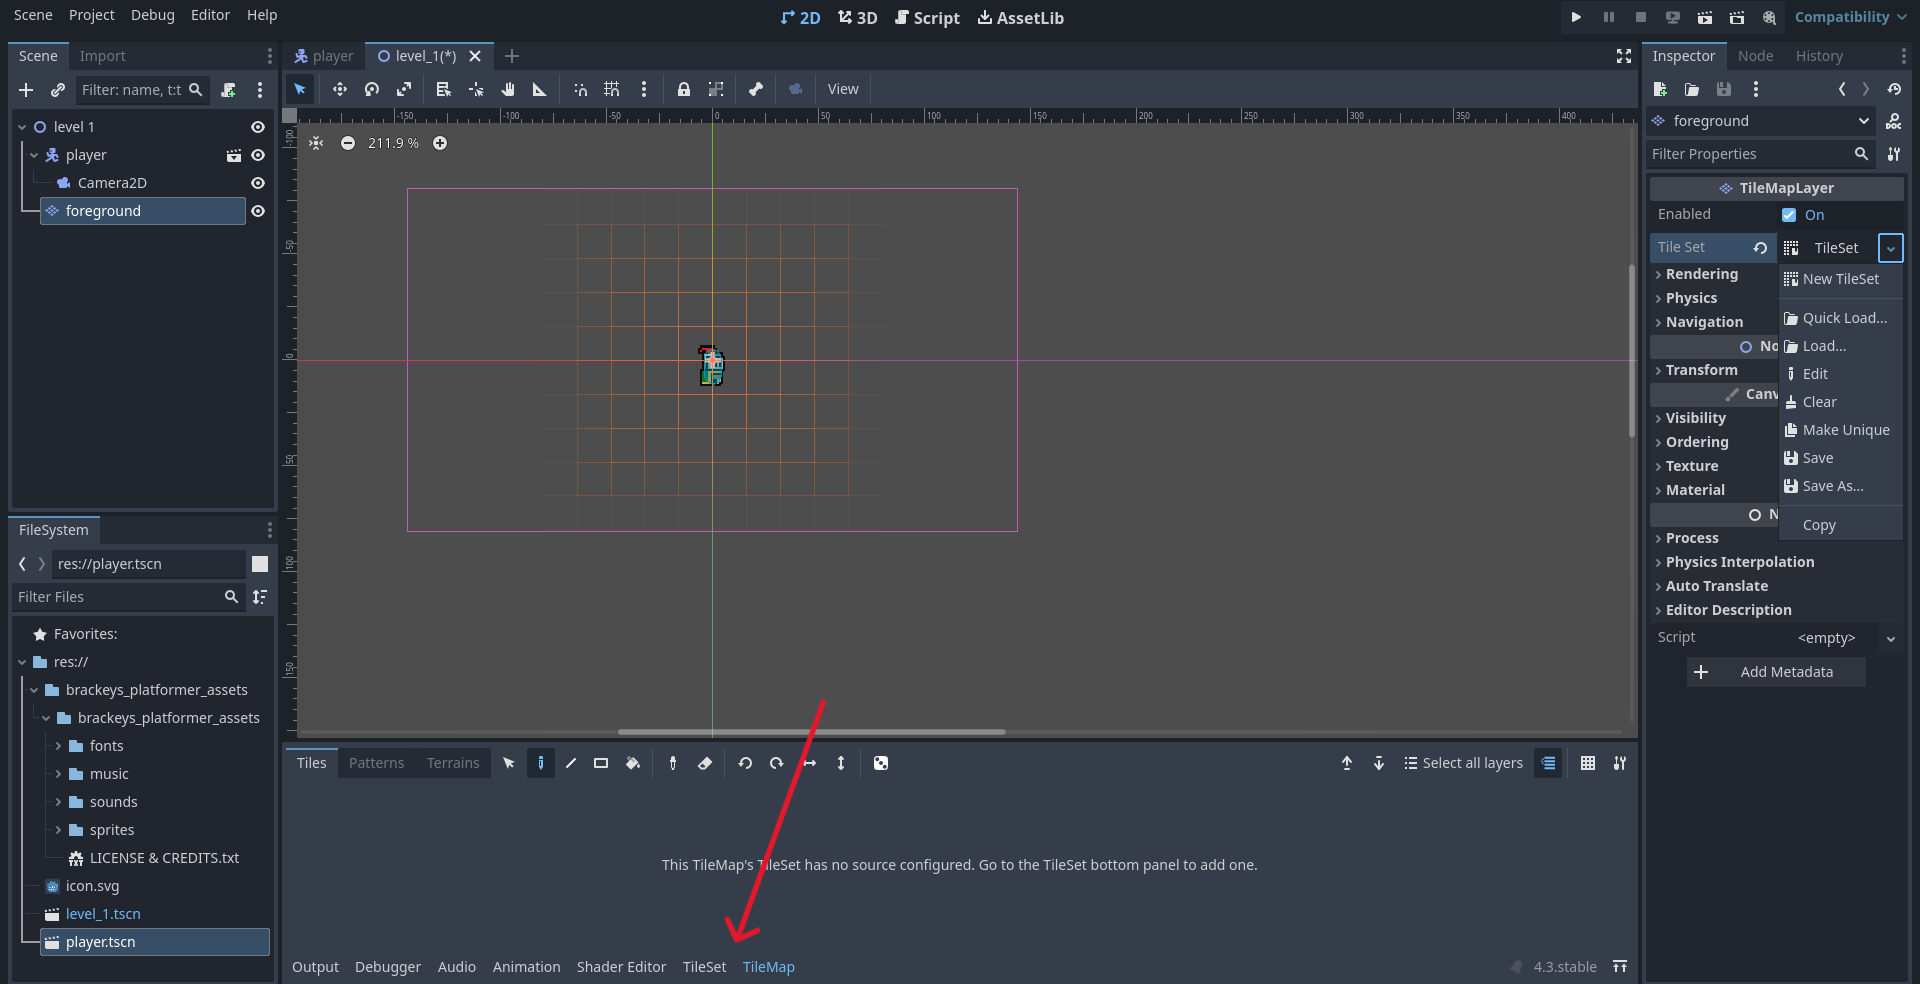
Inside the TileSet menu, click the + button and select “Atlas”.
Navigate to the world_tileset.png image in the sprites folder and load that. You will be asked if Godot can automatically create tiles, select yes.
Click the “TileSet” button in the inspector. Go to the “Physics Layers” drop down and click the “Add Element” button.
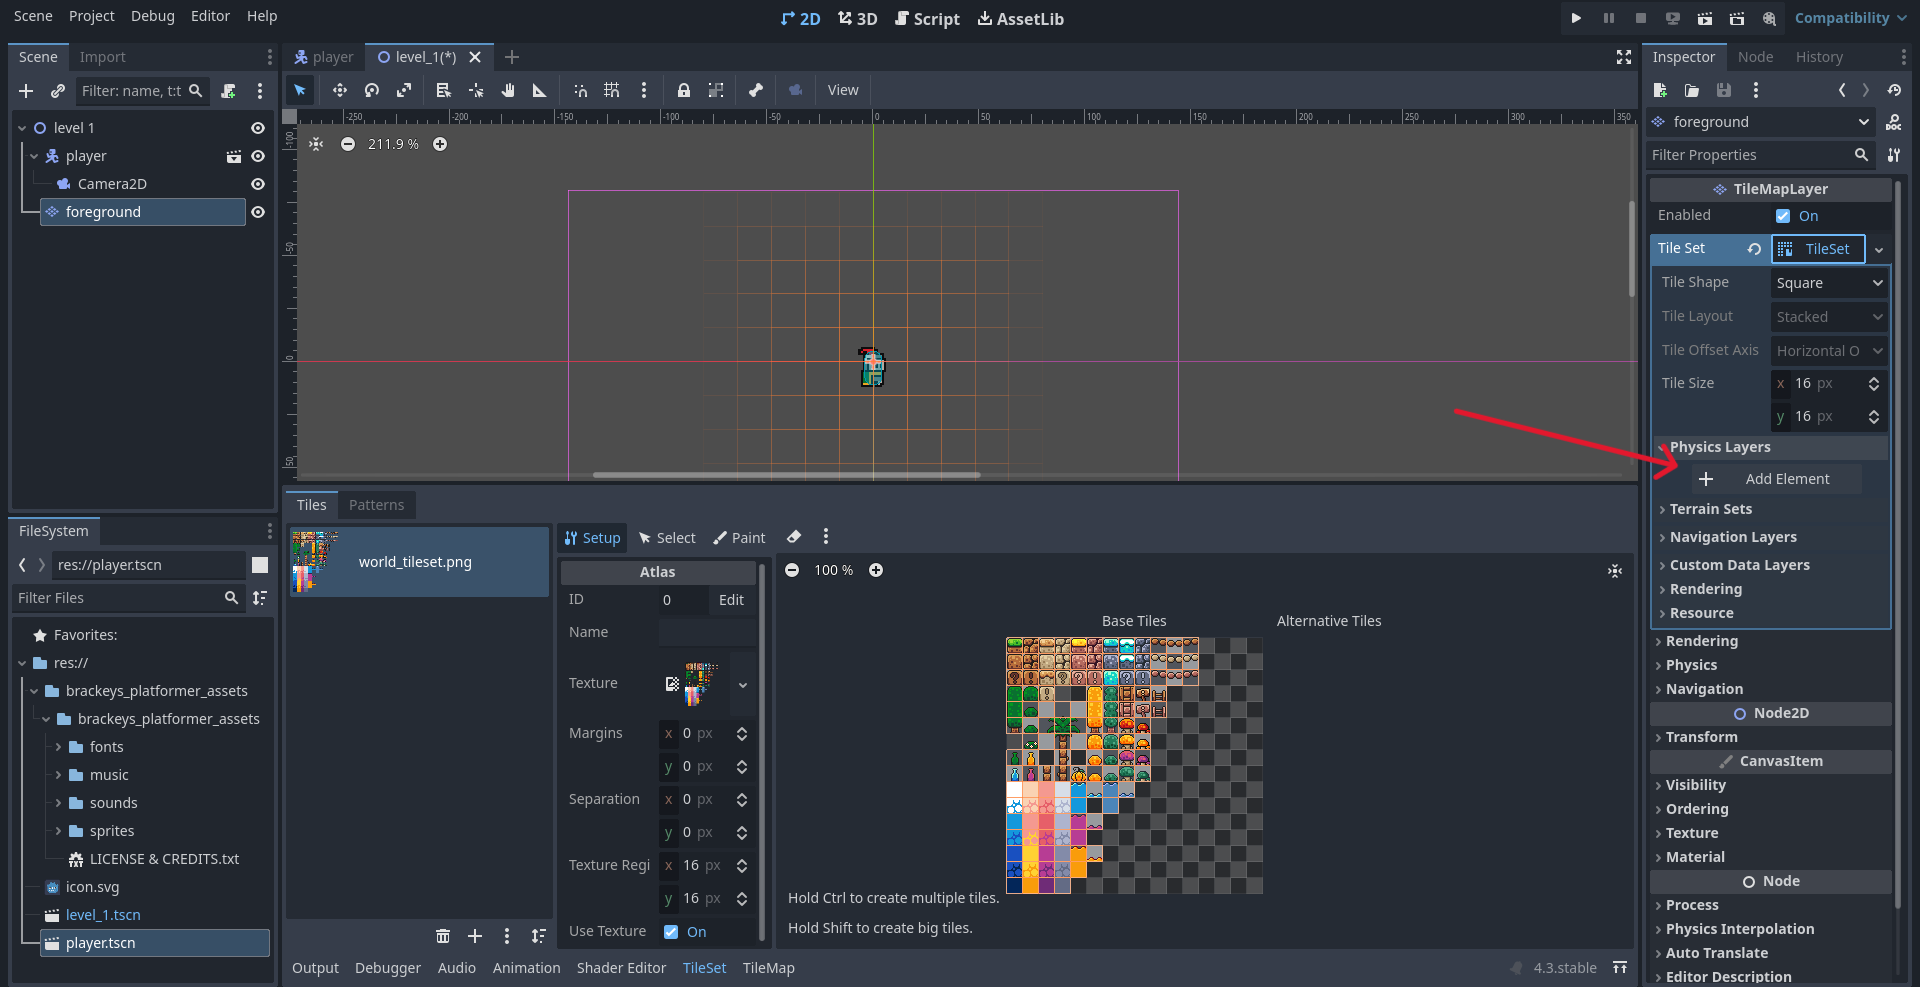
Move back to the TileSet menu. Click the Paint button and then click the drop down that appears and select “Physics Layer 0”.
Click on some of the square platforms and they should be given a blue collision box. It will look highlighted on the Base Tiles sections.
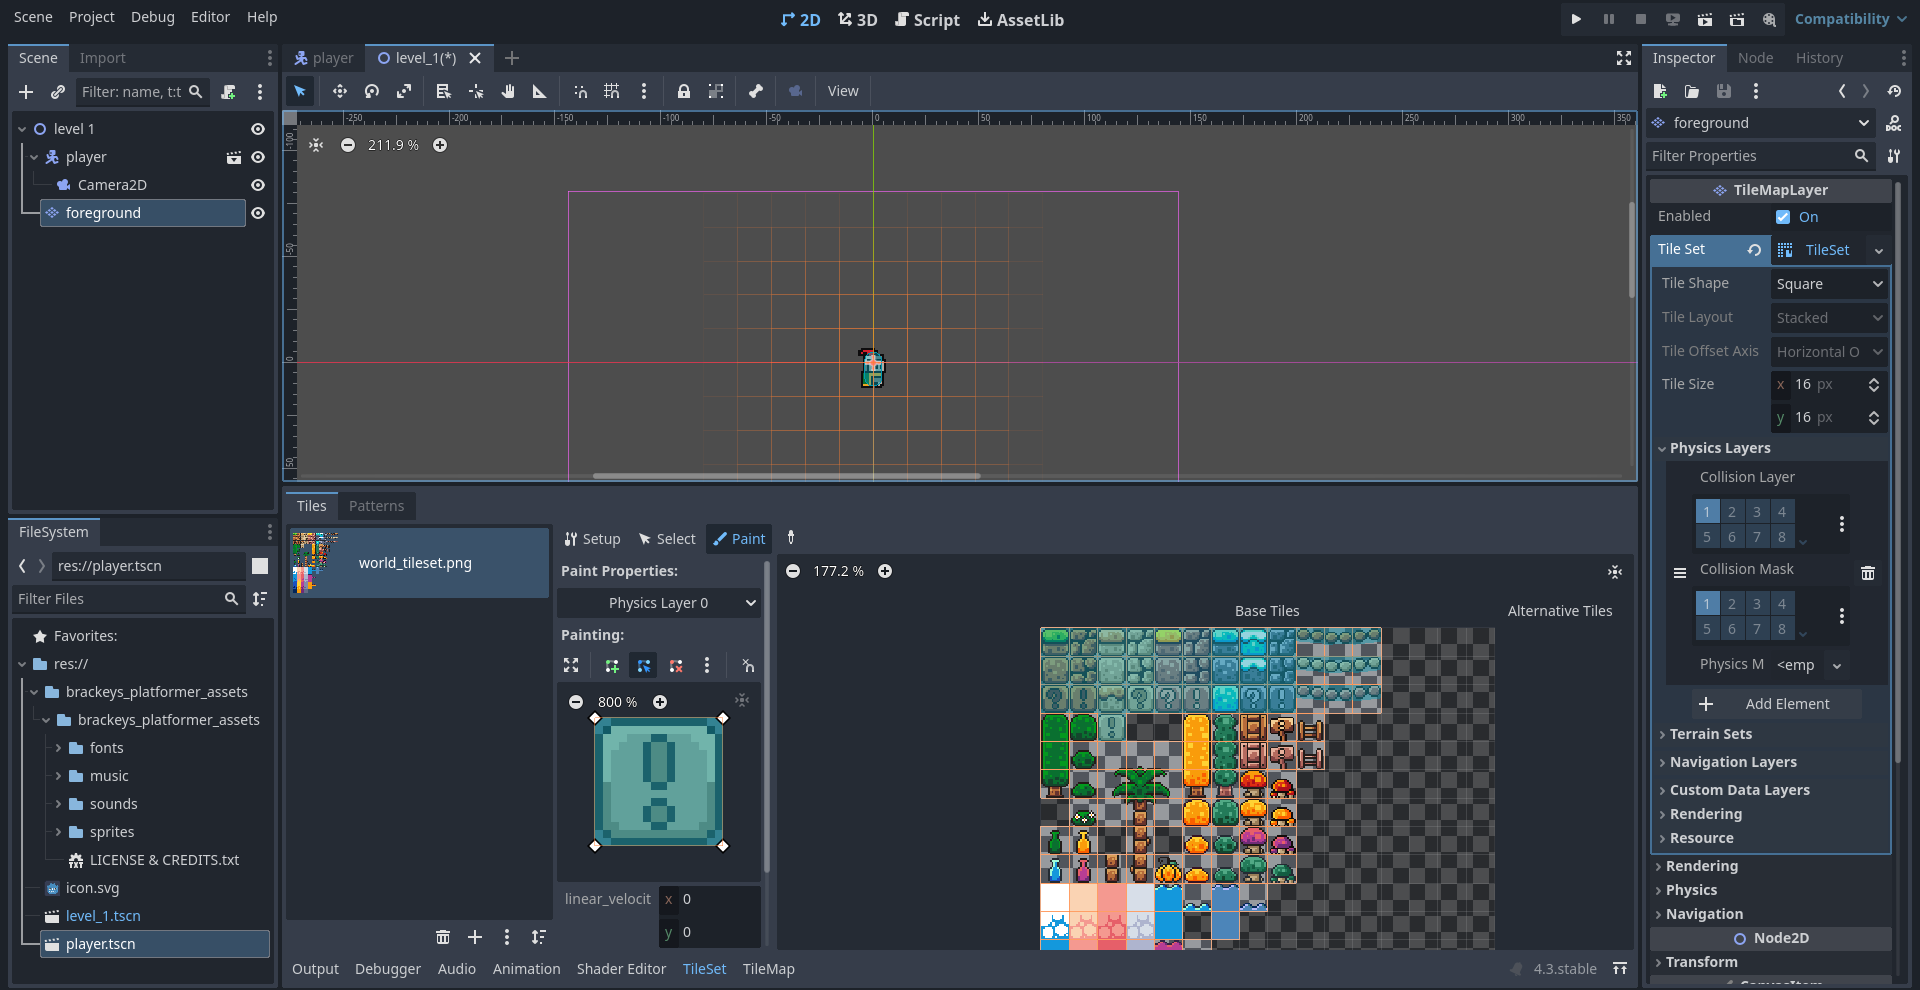
When you click on a sprite, you should see it appear in the Paint window. You can then drag the white diamonds so that the blue collision box roughly covers the sprite. For things like the ground sprites, the default square is ok, but you may need to play around for other sprites, such as the bridge sprites.
Now open the TileMap menu at the bottom of the screen and click on a tile to enable drawing in the editor. You can click to place individual tiles, or click and drag to paint them following the cursor. Play around with the tile paint tools to create a fun level to play. Some cool things to check out are the Rect tool and the Place Random Tile options.
Add a new TileMapLayer as a child of Level1 and place it above Foreground in the Scene Tree and rename it Background.
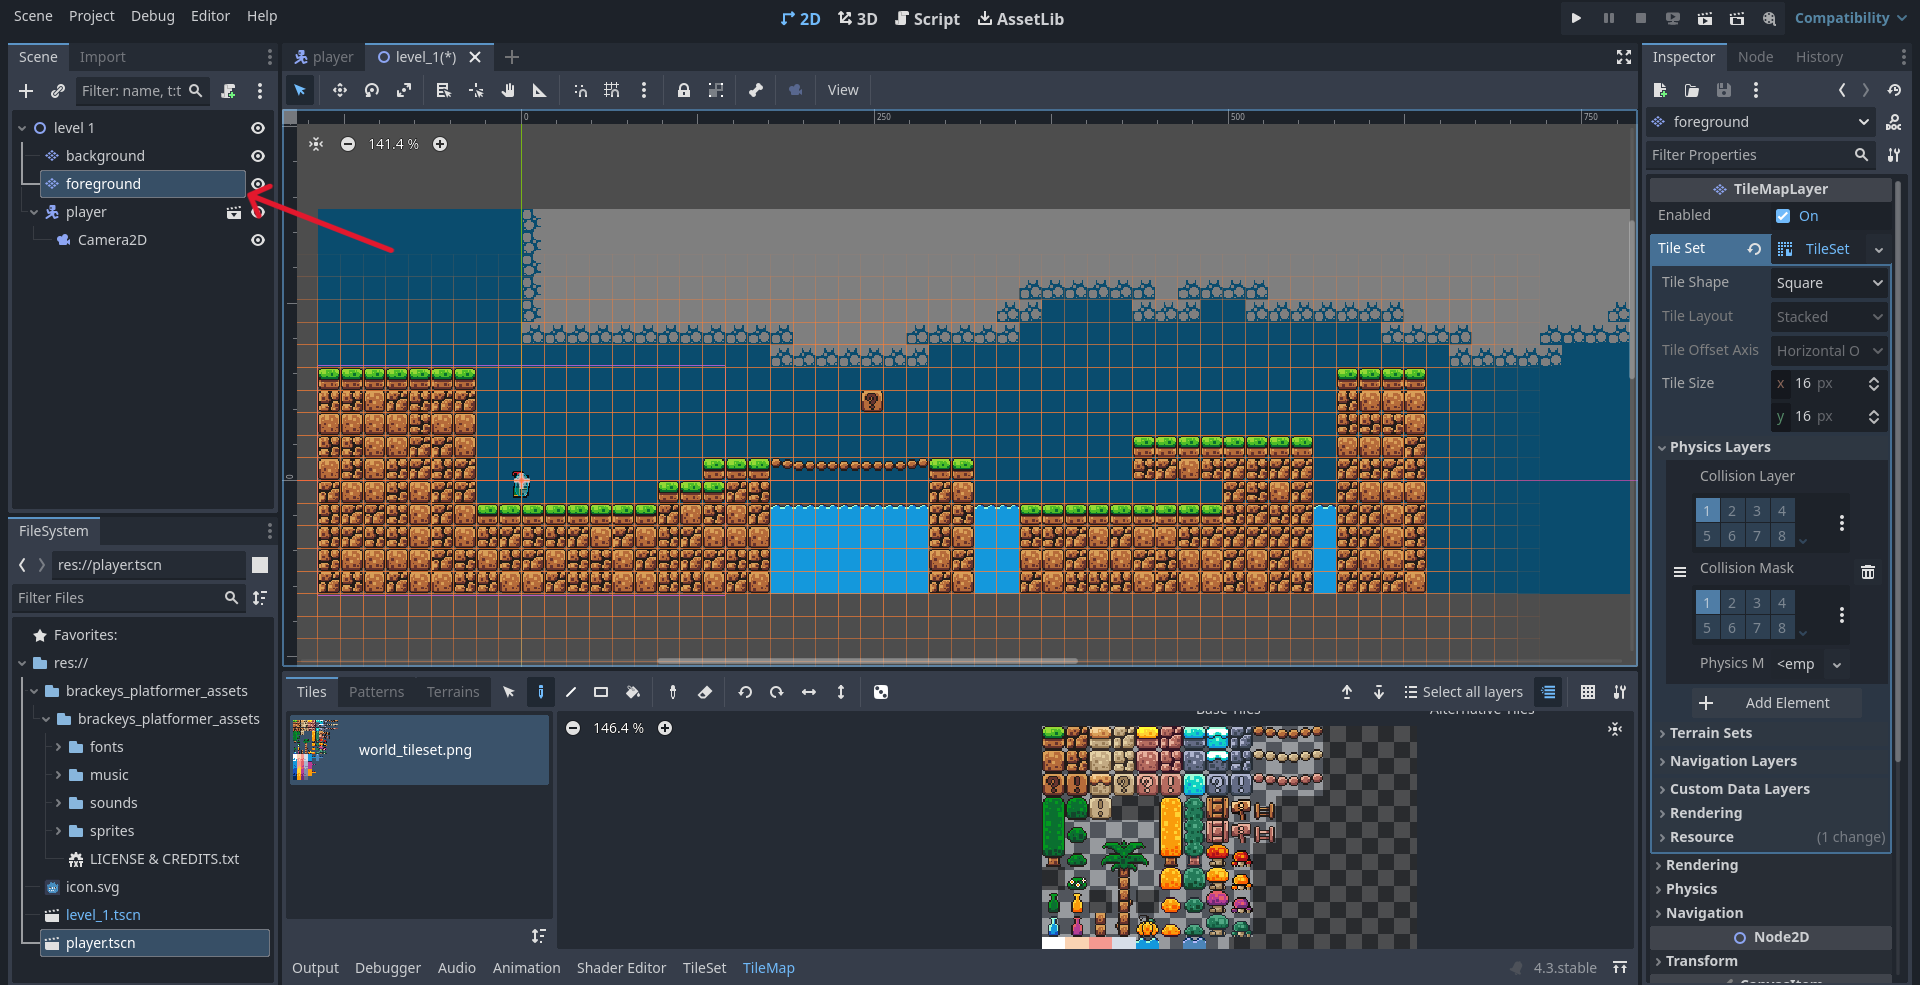
Repeat the steps used for the Foreground (ignoring the physics steps) to create your Background.
If you placed the Background TileMapLayer above the Foreground, Background tiles should appear behind the Foreground tiles. Unless your player is below the TileMapLayers, they will disappear behind the background, so make sure to move them below the Foreground in the Scene Tree.
- I have add the nodes
- I have setup my TileMapLayers
- I have drawn my level