
Extra: Follow Camera
This page works through creating a full 3D racing game step-by-step
Follow Camera
Delete your previous camera (if you have one).
The current car that I have doesn't have any features which tell you if it's the front or back of the car.
So I have added some **MeshInstance3D**'s and chosen different shapes (on the **Mesh**'s down arrow) and colours (through **Material > Albedo**). 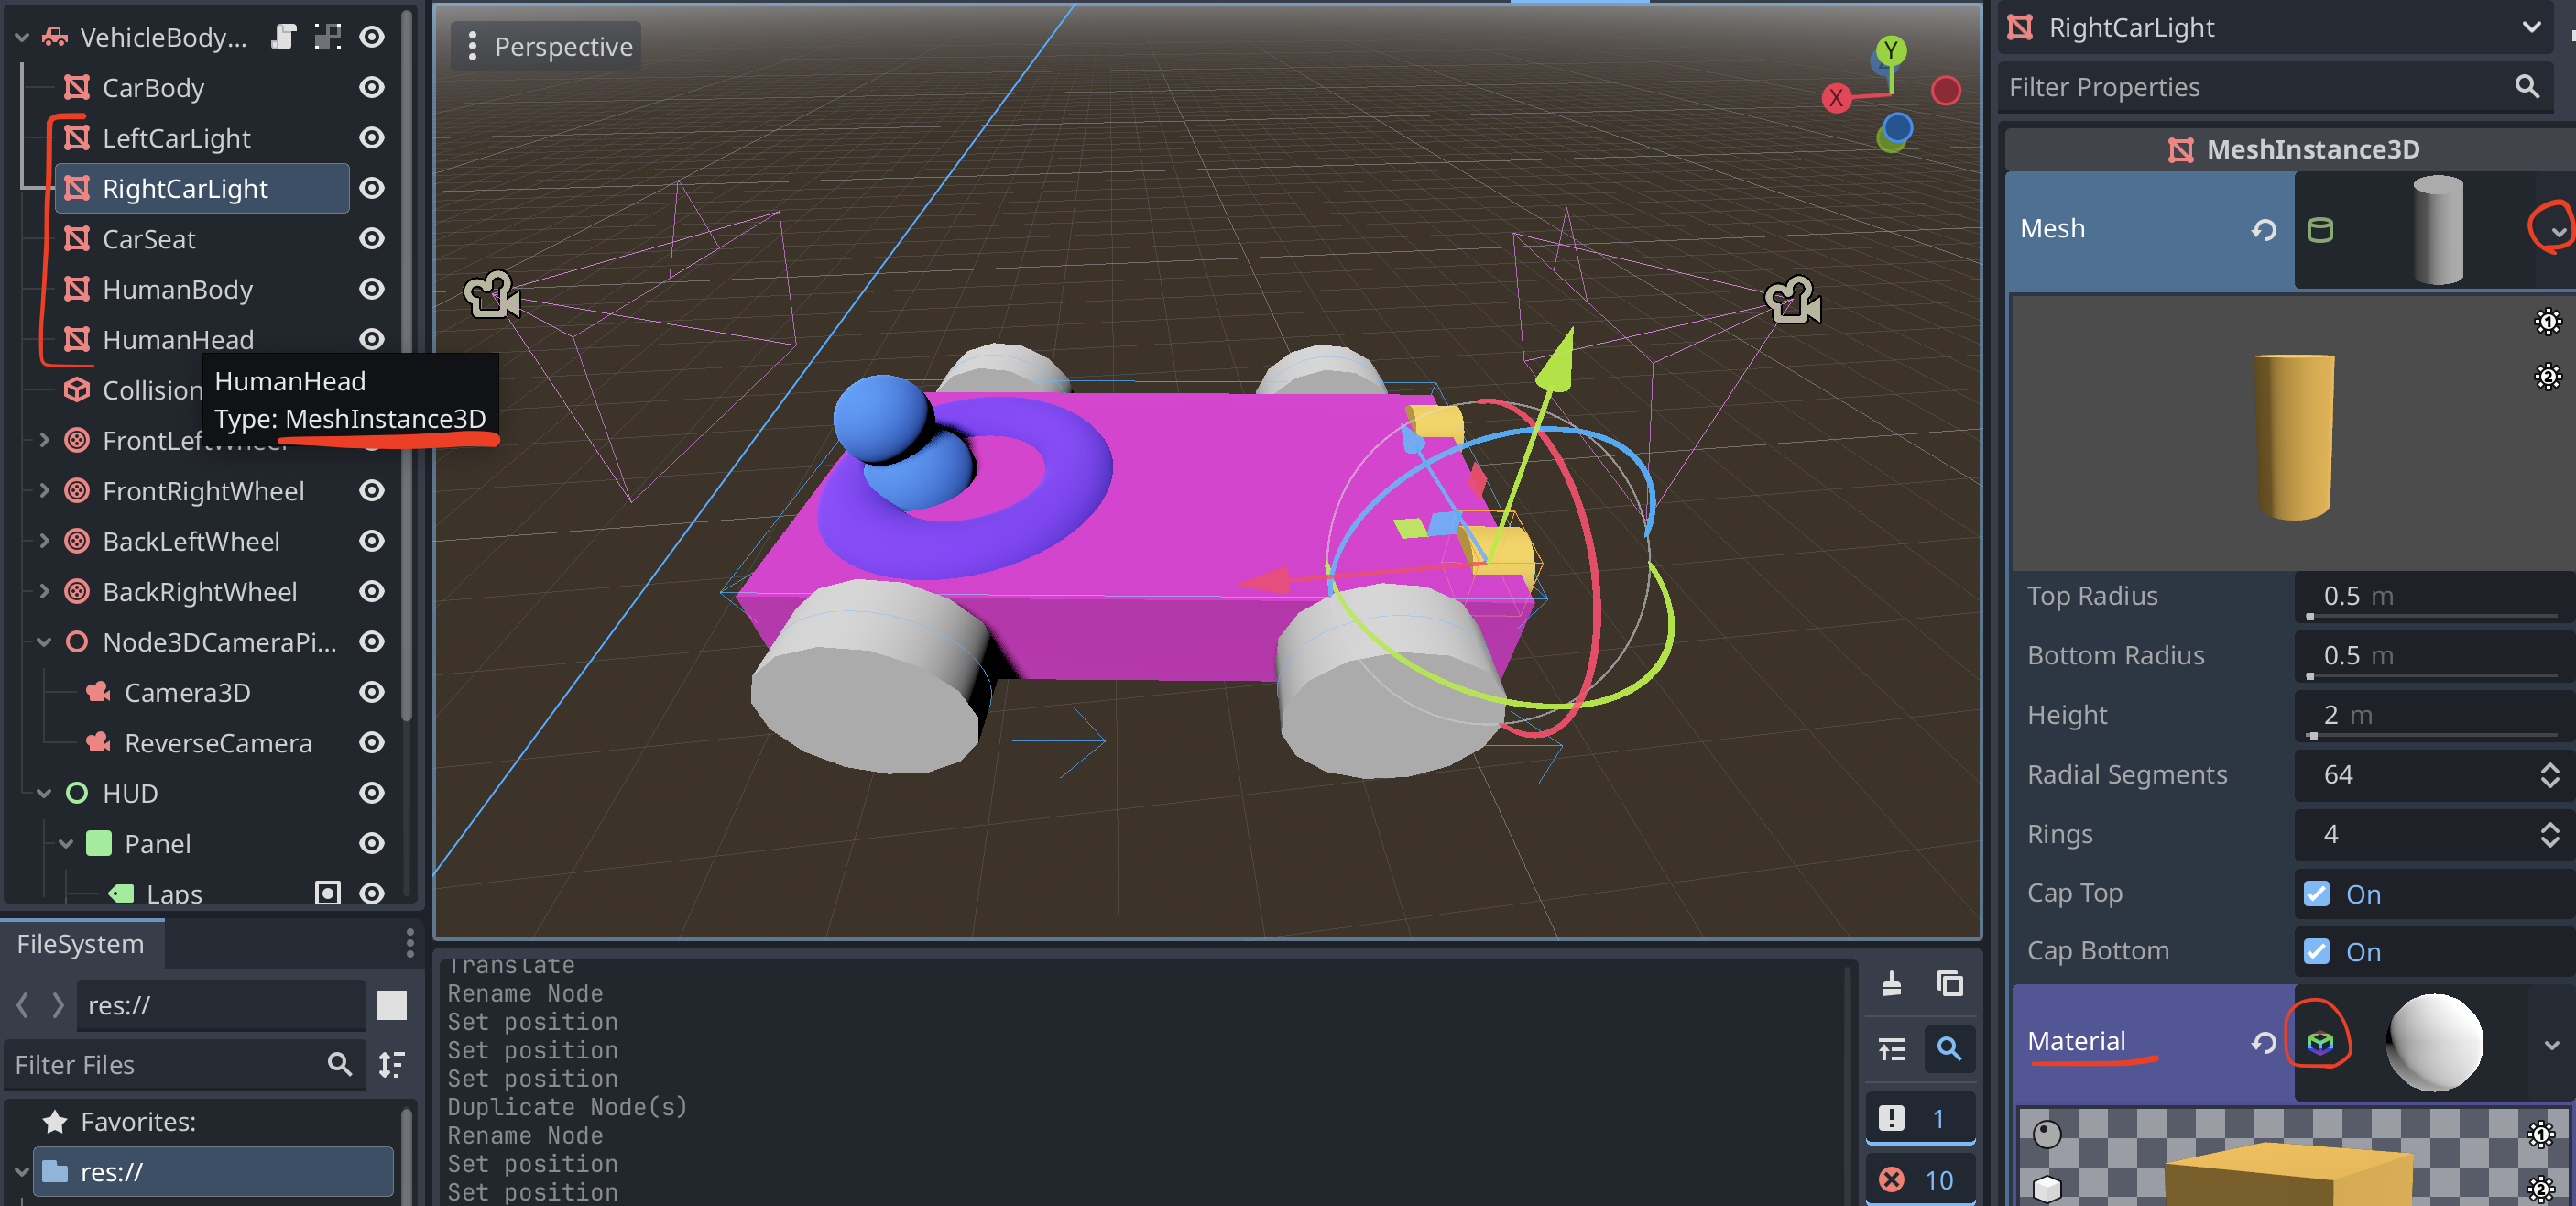As you can see in the above photo, you will need to add these three nodes:
- Node3D (pivoting angle) as a child of your VehicleBody3D car.
- Camera3D (front view)
- Camera3D (reverse view)
- Node3D (pivoting angle) as a child of your VehicleBody3D car.
In the front view camera:
Turn the Current checkbox on, as the car always starts with the front facing camera.
In the pivoting angle node:
Car PlacementIf you have placed your car in the world scene in a different spot than what you want, move your car to the start / finish line, because we will set the camera pivot node to the top level (and cause the cameras to not move with the car in the
world.tscnscene).If have already done this, move the car to the start / finish line and copy those (x y, z) coordinates into your
car.tscnscene into the pivot camera control nodes coordaintes and on your car.Turn the Top Level checkbox on, so it doesn't inherit the cars' transformations (the positioning).
We now need the front and back cameras to be facing both ends of the car. Use the position and rotation under the Transform tab to do this, with the end result looking something like the photo above.
Inside your car.gd script, you will need to adjust what the cameras look at as the car is running.
Add this code to your exisiting script.
# You can drag/drop the node into the script to get the references.
@onready var camera_pivot = $Node3DCameraPivot
@onready var camera_3d = $Node3DCameraPivot/Camera3D # Forward-facing camera.
@onready var reverse_camera = $Node3DCameraPivot/ReverseCamera
var camera_look_at # Variable to store where the cameras should look.

func _ready() -> void:
    camera_look_at = global_position # Set initial camera look-at point to the car's current position.

func _physics_process(delta: float):
    # Smoothly move the camera pivot towards the car's position based on speed and time
    camera_pivot.global_position = camera_pivot.global_position.lerp(global_position, delta * 20.0)
    # Smoothly align the camera pivot's orientation to match the car's orientation
    camera_pivot.transform = camera_pivot.transform.interpolate_with(transform, delta * 5.0)
    # Adjust where the camera should look at by adding car's linear velocity for a natural following effect
    # Change the '2.0' around to see what's best for your car
    camera_look_at = camera_look_at.lerp(global_position + linear_velocity, delta * 2.0)
    # Point the forward and reverse cameras at the adjusted look-at position
    camera_3d.look_at(camera_look_at)
    reverse_camera.look_at(camera_look_at)
    # Call function to check and update the camera view based on car direction
    _check_camera_switch()

func _check_camera_switch():
    # Check if the car is moving forward (dot product of velocity and forward direction > -1)
    if linear_velocity.dot(transform.basis.z) > -1: # Change this number around to see what the best is for you
        camera_3d.current = true # Use the forward-facing camera
    else:
        reverse_camera.current = true # Use the reverse camera for backing up
Test it out, and adjust any numbers that you see fit!
My car has a:
- Smooth third person camera