
knowledge hub
129
Check In: Testing the Current Game
This page works through creating a full 3D racing game step-by-step
Adding a Camera & Light
To view the current progress, you'll need to insert a Camera3D node as a child of your VehicleBody3D node.
<div class="tip wiki-aside">

<div class="wiki-aside-title">Positioning your camera</div>

    Use the green, red, and blue arrows to move the camera to an appropriate area overlooking the car.
    To see where you'll be driving put the camera just above the car, with the back wheels nearest to you.


    Change the viewport angle (rotation x) to -20 degrees to make it look down. Make sure to save it!

</div>
If it's too dark, add a DirectionalLight3D and rotate it to face downwards.
Current File Structures
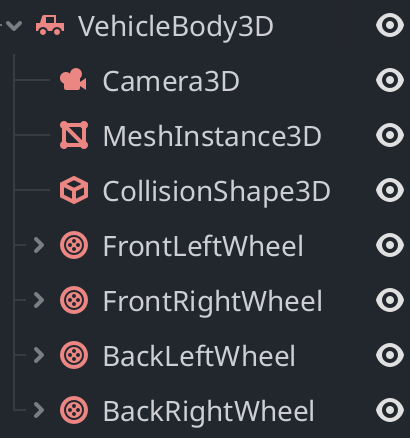
This is what your car file structure should look like. Rename the nodes to simpler terms, e.g. VehicleBody3D -> "Car".
What your world file structure should look like:
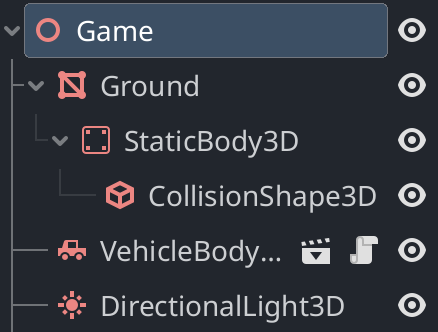
Now, when you play from your "Game" scene, you should see the car fall down and bounce into place.
So far, you won't be able to control it -- this is on the next page.
- I'm ready to drive my car!